Tuesday, February 26, 2013

Various Ships Update

Here are some Imperial Transports that I have been working on. They are made from Firestorm Armada transports and they have antenna added to them. The one in the center back is supposed to look like the bridge. These will be primed up and painted soon with a couple other lovely surprises. 

Three are the start of 3 new strike cruisers for the Salamanders fleet (was going to be Raptors but the green looked more salamanders). I am using two sets of parts from an alternate parts ddealer, resin caster GW parts, and some launch bays. These will be carrying a whole bunch of Thunderhawks. 

Finally I will not have to use stand-ins anymore for a Retribution or torpedo Dauntlesses! I really like how they turned out. 

Battle Report 4: Imperial Navy vs Dark Eldar

+++Imperial Navy vs Dark Eldar+++
Scenario: The Bait

+Imperial Navy (BFG:R)+
Armageddon (ld 8)
Dictator (ld7)
2 Cobras (ld 7)

+Dark Eldar (BFG:R)+
Torture (ld 8, Fiend Ascendant Pattern Carrier)
4 Corsairs (ld 7, 2 Venomed Blade Phantom Lance variant, 2 Lost Hatred Weapon Battery variant)

Here is the zoomed out overview of the board with only a slight bit of the left side cut off. The Armageddon is the "Bait" fleeing from the Dark Eldar.  The Imperial player is able to go first.

Here are the Dark Eldar, waiting to engage.

The Armageddon curves right around the asteroids, and Dictator and the Cobras enter the board and launch everything they've got.  10 torpedoes total and 4 bombers.

The Dark Eldar Corsairs go on All Ahead Full and blast forward. 

The Torture pushes forward but hangs back behind the Corsairs.

Tbe Corsairs fire on the Armageddon and cause no damage but take down both shields.

The Torture launches 3 fighters escorting 1 bomber.

The Dictator reloads ordnance,  the Cobras reload, and the Armageddon fails to lock on. The Cobras move forward to engage.

The Armageddon shoots the Corsairs, causing 2 damage and 1 critical, finishing the escort off.  Two torpedoes from the
Cobras were braced by the Corsairs and the rest were killed by turrets.

The Corsair push forward and cause 3 damage to the Armageddon while the Torture fires on the Cobras, killing one of them.  The bomber attacks the Cobra but fails to damage it.  The remaining 3 Dark Eldar fighers destroy the 4 Imperial Bombers.


The remaining Cobra disengages.  The Armageddon takes a damage from moving through the blast markers. Both cruisers shoot the Corsairs and kill one of them.  Torpedoes fired from the cruisers do one damage to the Torture.  Where the cruisers ended up after moving is shown in the following picture.

The Dark Eldar move into near point blank range and fire upon the Armageddon, which braces against 1 hit from the Corsairs but takes 2 damage from the Torture.  The Torture's bombers hit the Armageddon causing 2 damage. The Armageddon is now crippled.

Both fleets take the turn reloading and maneuvering. 1 damage is done to the Torture.

The cruisers fly away from the Dark Eldar and exchange some fighter and bomber attacks.  There is a missing picture after this one where the Dark Eldar fly up right behind the Armageddon and fire upon it, causing 1 damage which is braced.  Bombers from the Torture also hit the Armageddon causing 1 damage which is braced.
The Corsairs fire point blank at the Armageddon, which braced.  Bombers press forward the strike either cruiser.

The cruisers make their way into a circular movement.  The Dictator reloads.  The Armageddon causes one damage to the Corsair.  


The Imperials come together to nearly complete their circle and kill a Corsair with lances from the Armageddon. The Dark Eldar fly up as close as possible to fire upon the Dictator without being able to be rammed by the Armageddon.  The Dictator takes only one hit and braces some.  This is a big mistake for the Dark Eldar...

The Dictator makes a clumsy failed leadership to navigate the asteroid field and takes 3 damage (ouch!) which cripples it. The Corsairs brace, seeing what is coming, but it isn't enough and the Corsair is finished off.  Enough damage was caused by the Armageddon to cripple the Torture.  That was it! The Dark Eldar had pretty much no chance after that! The Imperial disengaged and that was the game! Imperial victory!

Tuesday, February 19, 2013

The Doran'Por and Perseus Sectors

I first noticed the battle reports that Helios Ravensnest from Fearless Games was doing on his youtube channel in late 2011. I was fascinated by the way he did his battle reports, with video, storyline, and narration. So I struck up a conversation with him. And now, quite a long time later and a few more battles into the Doran'Por series, we have decided that my game group would make some videos that intertwine and would take place in the Perseus sector, the closest sector inward toward the center of the Imperium. Here are the videos in order so you can access them easily. Hope you enjoy our nerd fun videos and your Battlefleet Gothic motivation increases!


The Battle of Doran'Por (Doran'Por Sector)

The newly formed "Son's Of Horus" have stolen the Second Planet killer that Abbadon had built. Now they plan to show off their power and finish what their late Warmaster started, and they have chosen the Tau Sept world of Doran'Por as their first victim. Will the tau stop the Chaos forces from destroying Doran'Por? Will the Ad Mech's support be enough to turn the tide? Stay tuned.

Part 1


Part 2


Part 3


Part 4


Part 5


The Kalous Run (Doran'Por Sector)

After the lost of their Sept World, the Tau have decided to leave the Doran'Por Sector to find a new Sept world so they may rebuild. Only 4 more supply ships need to reach the fleet, and once they do they can head out. But the Eldar have other plans in mind....


Trailer for Future Videos 


The Conflict of Perseus - Xetic (Perseus Sector)


Deliverance (Perseus Sector)

The Conflict of Perseus - Xetic

Here is the first video of the Perseus series! This video was made in partnership with Helios Ravensnest and Fearless Games.  The entire series is posted HERE.

The Tyranid fleet enters the Perseus sector and draws near toward the planet Xetic.  The Carcharodons are all that stand in their way.  This video is based off of our Battle Report 3: Space Marines vs Tyranids. Let us know if you have recommendations or requests for the next one!


Saturday, January 26, 2013

Making BFG:R Tyranids 2

Here are some of the emergent drones being worked on. I am having to fill their mouths with hot glue to fill it up, then I move on to cover the whole top part and texture it. I am making 6 of them. 

These are the Juvenile hives. The one on the right is about where I want it to be with the hot glue but I will be adding some green stuff afterward. I want these to look like a step up in the evolution of a hive ship, from an emergent drone, tons juvenile, to an adolescent. Some day I will make an adult hive. 

Here's where I want them to be before I add green stuff. I am definitely happy with them but I will hopefully like them more when they are entirely done. 

Thursday, January 24, 2013

Battle Report 3: Space Marines vs Tyranids

+++Space Marines vs Tyranids 1500pts+++

+Tyranids (current BFG:R)+
Adolescent Hive Ship + Extra Spore + Reinforced Carapace + Solar Vanes Ld 8 = 360 + RR
5 Claw Kraken 250
2 Vanguards 60
10 Drones: 6 Pyrodrones and 4 Biodrones 200
5 Biokraken with Tenacity 275
1505 (5pts over by permission)


+Carcharodons Chapter Space Marines (current BFG:R)+
Master of the Fleet 50
Ultima 450  Ld10
5 Strike Cruisers (SC), all extra shield. 2 are the gun variant (GSC) 800
GSC1 Ld9
GSC2  Ld10
SC1  Ld10
SC2 Ld10
SC3 Ld8
5 Hunters Ld10 200
1500


Scenery
The scenery was set up by Gavin as I got all the gear we needed for the battle, along with amazing creepy free ambient space music. Here's Gavin's Space Marine pose:


Here's the usual Gear:
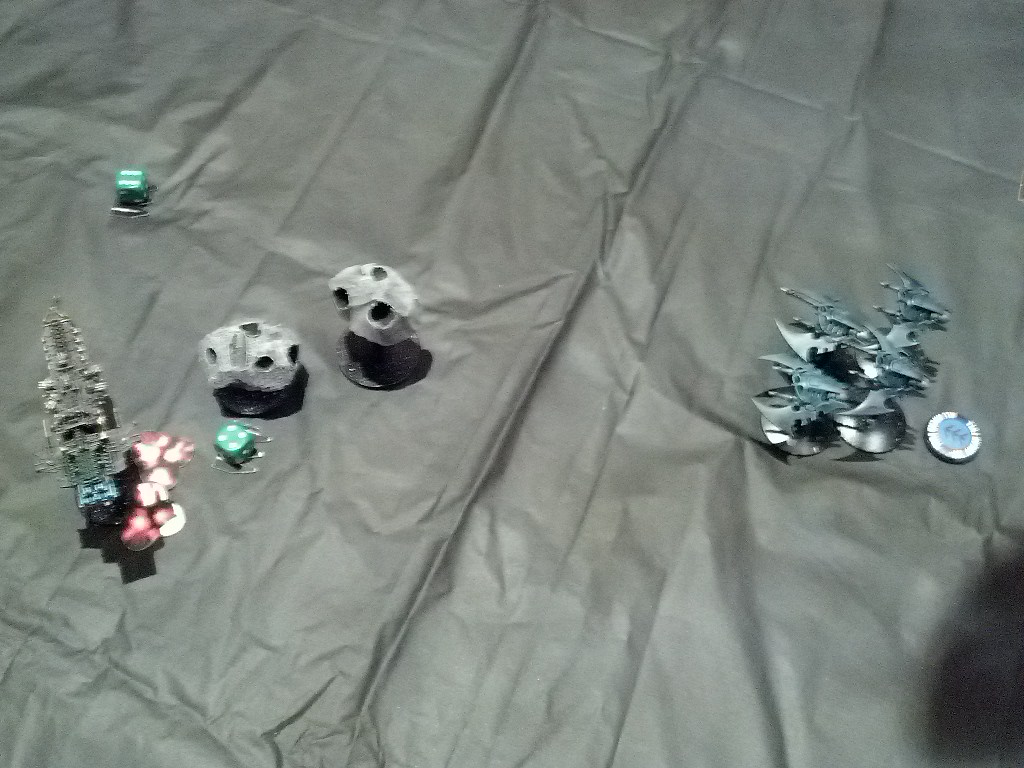

Table Setup:


Scenario: Fleet Engagement
Both fleets chose wedge so we deployed under the style B requirements. Gavin (SM) won the roll-off and chose the "north" side with the planet.
The Tyranids (me, duh) were forced to deploy first so Hive 2 was put down. In the end, the Tyranids were clustered and the SMs crowded around the planet, most in its gravity field.


+Tyranids 1+
Just about immediately, I failed my first synapse roll. Luckily, the second hive was there and it held out until the last roll. At that point, I used a RR to make sure I had some good first turn control. With full control of the fleet, I pushed forward to go through a gap in the asteroids and anticipated some early conflict based on the planet being there to allow his fleet to get close with extra turning.


+Space Marines 1+
All Space Marines besides the rear Strike Cruiser squadron used the planet for the free turn. They curved around the planet and launched torpedoes and Thunderhawks, setting up turn 2 to be huge. (sorry about the blurry picture)


+Tyranids 2+
The Tyranid Kraken all went on All Ahead Full to get as close as possible so as to engage the next day. Each other squadron passed their Synaptic Control checks. The Tyranid batteries from the Pyrodrones and the Hive ships destroyed the Space Marine torpedo waves.


The Tyranid Hive Fleet pushes forward towards the endangered planet, though the Carcharodons stand in their way.

The Space Marine Thunderhawks began wading into the Tyranid Antibodies, cutting a squadron and a half down before most of them had to return to their mother-ships.


+Space Marines 2+
The Hunters and Strike Cruisers reloaded their ordnance while the Ultima Battlebarge and the Gun Strike Cruisers locked on. The entire fleet advances to pass through the gap in the asteroids. The Hunters burst forward, turn to their port side, and prepare for a torpedo strike.


Gavin and Michael consider their targets...
and then this happened......
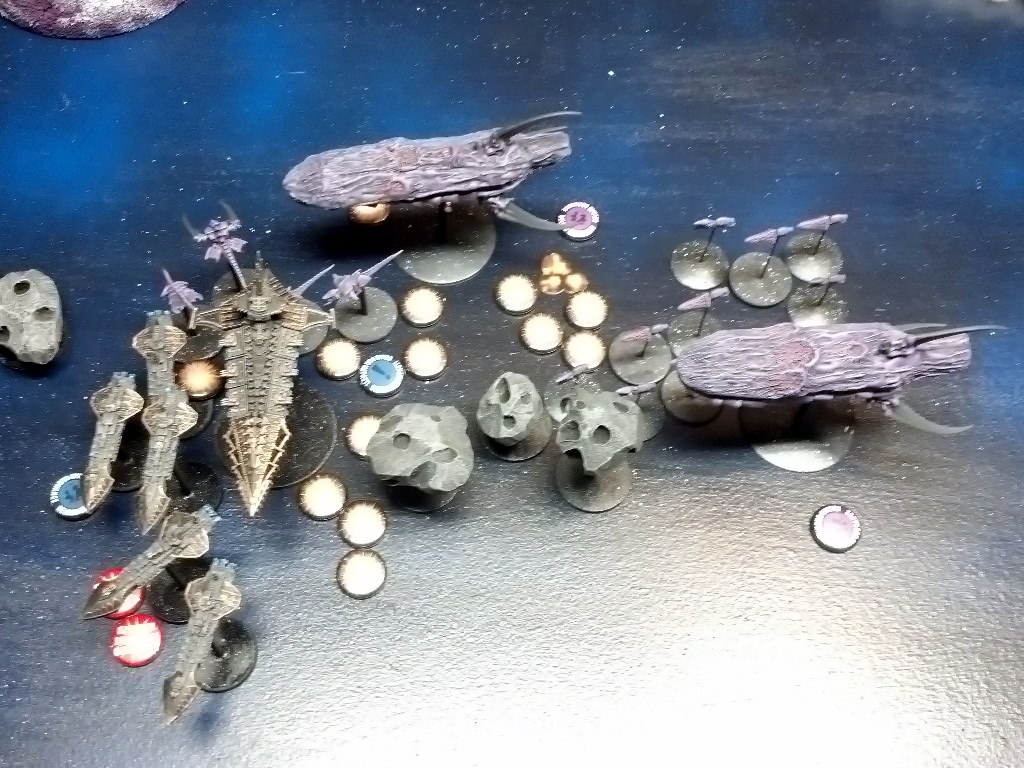
 Survey the damage.... Space Marines, with a good turn of rolling and lock on, can do some devastating damage with bombardment cannons.

The Gun Strike Cruisers destroy a Biokraken, the Ultima kills two more of them (that's the amazing roll in the picture above, doing 6 hits), and the Hunters kill a Vanguard and 2 Claw Kraken. Quite a turn for the Space Marines!


+Tyranids 3+
The Hives immediately reload ordnance and use their last reroll.  After this, the Claw Kraken turn and engage the Hunters with their claws and batteries, killing two of them and causing them to brace for impact.  The Biokraken fly forward and do 2 hits the the Ultima Battlebarge and knock a shield down with their batteries. The Pyro and Biodrones fire at Gun Strike Cruiser 1, knock 2 shields down, and do 1 hit. The Hive ships then fire at the same target, doing 2 hits, crippling it.


4 of the Antibodies were destroyed by Thunderhawks. The Antibodies ended the turn, lurking behind the Kraken ready to board the oncoming Strike Cruisers.

+Space Marines 3+
The Ultima locks on, the Strike Cruisers reload their ordnance, and the Gun Strike Cruisers fail to lock on. The Hunters navigate the asteroids and flee the Kraken claws. Their batteries happen to do a hit to the Biokraken! The Ultima, having pressed forward into the asteroid gap, kills 2 Claw Kraken (wow) and the newly launched Thunderhawks would the Kraken once (I believe this was a mistake in the game because none of the SM ships has ordnance reloaded).

The Antibodies pose for a strike during the next turn.

+Tyranids 4+
All synapse passed. The Claw Kraken damages the Ultima 1 time, the Biodrone does another. Hive 1 launches Antibodies and kills the remaining Hunters (game changer).  Gun Strike Cruiser 1 (currently crippled) took 3 hit and runs from Antibodies (dorsal, starboard, and port). The Drones cause enough damage to the Ultima that its shields are knocked down (the blast markers are shifted in the picture but should be against the Ultima's base).  This was a dangerous place for the Ultima to be in because it allowed for all those Feeder Tendrils to attack it.  This was another possible game changer: The Ultima took 8 critical damages: dorsal, starboard, port, prow, engine (now down to 8 hits left), and 3 fires (!!!).  In the end phase, it repairs all the fires with a good roll.


+Space Marines 4+
Sensing the downfall of the Ultima Battlebarge, the Carcharodons decided to disengage. Close game! Lets' see the victory points...

This was the table after the Space Marines disengaged.

+End Results+
Space Marines: 151.25 Victory Points (including the rerolls and the 5 points over)
Tyranids: 330 Victory Points

+TYRANID SOLID VICTORY+

+Conclusions+
Gavin: [not received yet]
Dan:  Part of the purpose of this game was, besides the campaign, to test out the Tyranid BFG:R list.  There are some things that need to change about it: the Claw Kraken have more guns than claws. This is a problem. Feeder Tendrils are way to situational, and it makes the Vanguard more of a gun ship, but it used to always be a close combat ship. This needs to change. Really, the Tyranid fleet was tons of fun to play, but they aren't easy to work with.  Having all front facing guns makes some of their positions really dangerous. For example, Gavin out-maneuvered me in this game and forced me to turn closer to him so he could cross my T on lock-on.  This hurt like hell.  The 2 hit escort rules in the new BFG:R were very simple to use and proved to be lots of fun. The Kraken feel a bit slow at 20cm movement, but the 2 hits makes them worth it. Also, we are using the original Kraken 4+ auto brace instead of shield instead of just giving them a shield. Overall, this was a great game, loved using the new Tyranid fleet, loved using the Battlemarkers, learned a lot, and loved seeing the Carcharodons do what they do.

Wednesday, January 23, 2013

Making BFG:R Tyranids 1

So, for BFG:R, I have been working on some new stuff for the new Tyranid ships such as the Emergent Drone ship, the Leviathan, and the Juvenile Hive ship. My goal is to use Tyranid models and pieces I already have. I plan to make all my ships on my own and not have to buy the GW models (not that I dislike them or anything...).

First, the Emergent Drone:

At this point, it is a Carnifex head with some Hormagaunt legs and the tip of a Deathspitter. I will be using green stuff and a hot glue gun for the rest of it. I thought it would be horrible at first, but I like where it's going so far.

Next, the Juvenile Hive:

Admittedly, this will need a lot more work than the Emergent drone but I think it will work out with green stuff and hot glue. Its an old biovore with Trygon claws and an old barbed strangler tip.

More progress to come! I am also working on a Leviathan as well. Pictures later.