Necrons vs Craftworld Eldar
Scenario: Escalating Engagement
Points: 1500
Sun Positioning: Galactic West
Lists:
Necrons (BFG:R)
Cairn Tombship with Sepulcher and +1RR
Scythe
Shroud
Jackyl 1 (squadron of 3)
Jackyl 2 (squadron of 3)
Dirge 1 (squadron of 4)
Craftworld Eldar (MMS v1.9)
Void Dragon with and +1RR
Dragonship with Weapon Batteries and Launch Bays
Wraithship 1 with Pulsars and Torpedoes
Wraithship 2 with Pulsars and Torpedoes
Wraithship 3 with Pulsars and Torpedoes
Shadowhunter 1 (squadron of 3)
Shadowhunter 2 (squadron of 3)
Escalating Engagement:
 |
| Necrons - 1. Dirge 1 2. Shroud and Jackal 2 3. Cairn Tombship 4. Scythe 5. Jackal 1 Craftworld Eldar - 1. Void Dragon 2. Wraithships (squadroned) 3. Dragonship 4. Shadowhunter 1 5. Shadowhunter 2 |
 |
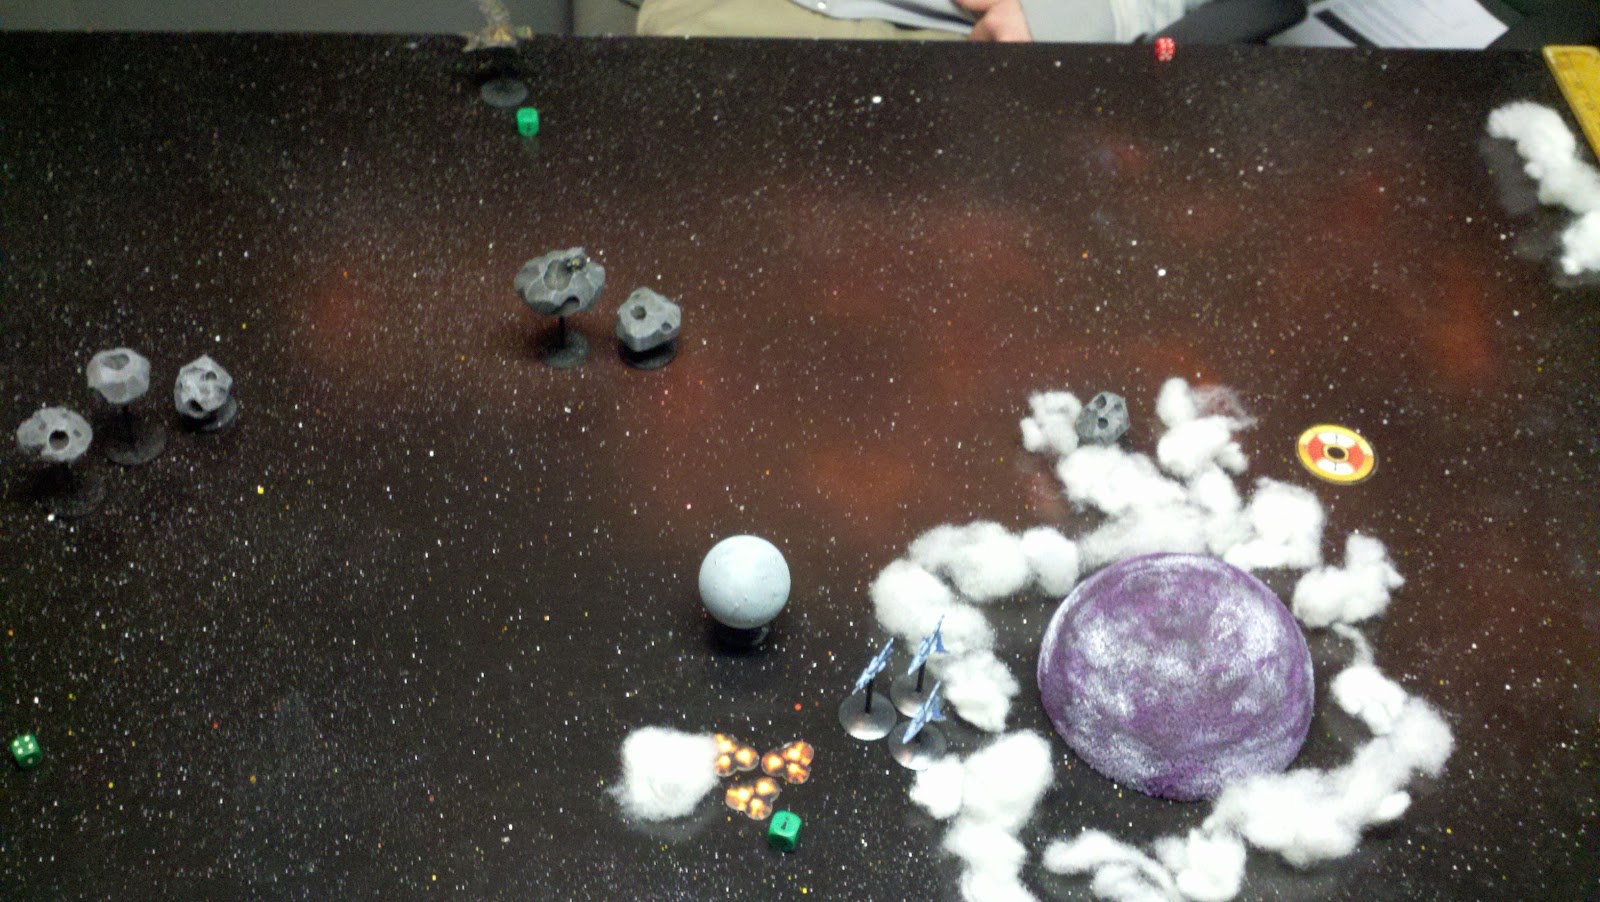
| Deployment: Necrons roll a 2 for deploying a force and place their Shroud and Jackal 2 to the south. CWE roll and 4 and deploy their Shadowhunter 1 to the northeast. |
 |
| Necrons 1: Necrons all ahead full both squadrons. The Shroud ends up going faster and crosses the half way mark of the board. Jackal 1 is a little ways behind. |
 |
| The escalation die is rolled as a 3 (Tombship) and is placed on the western edge.
|
 |
| CWE 1: The CWE fly past shroud (with the sun at their side) and blow away Jackal squad 2 with very good rolls. At this point, we are marveling at the power of the CWE weapon battery. |
 |
| The escalation die is rolled as a 1 (The Void Dragon) and is placed on the southern edge, east of center. |
 |
| Necron 2: The Tombship fails to arrive. In order to escape the Shadowhunters, the Shroud goes on All Ahead Full and bursts away (70cm), hoping to join up with the Tombship later. |
 |
| The Escalation die is rolled as a 4 (Scythe) and is placed just south of the Tombship die on the western edge. |
 |
| CWE 2: The Void dragon arrives and goes on All Ahead Full orders and deploys its bombers. Shadowhunter 1 spends the turn about-facing and stays near the Void Dragon. |
 |
| The escalation die is rolled as a 3 (Dragonship) and placed on the eastern edge. |
 |
| Necron 3: Unfortunately, the Tombship fails to arrive yet again. Sensing the wrath of the Eldar, the Shroud goes on All Ahead Full and spends another turn heading towards the Tombship. |
 |
| The CWE bombers continue to approach the Shroud through the asteroid field. |
 |
| The escalation die was rolled as a 5 (Jackal 1) and was placed on the left edge between the Tombship die and the Scythe die. |
 |
| CWE 3: No more ships arrive. The Shroud Braces for Impact sensing the oncoming damage. The Void Dragon reloads its ordinance after using a reroll. Shadowhunter 1 does a damage with the Phantom lance. The Void dragon then damages him the Shroud more time, crippling it. He braces the lance shots of the Void Dragon. |
 |
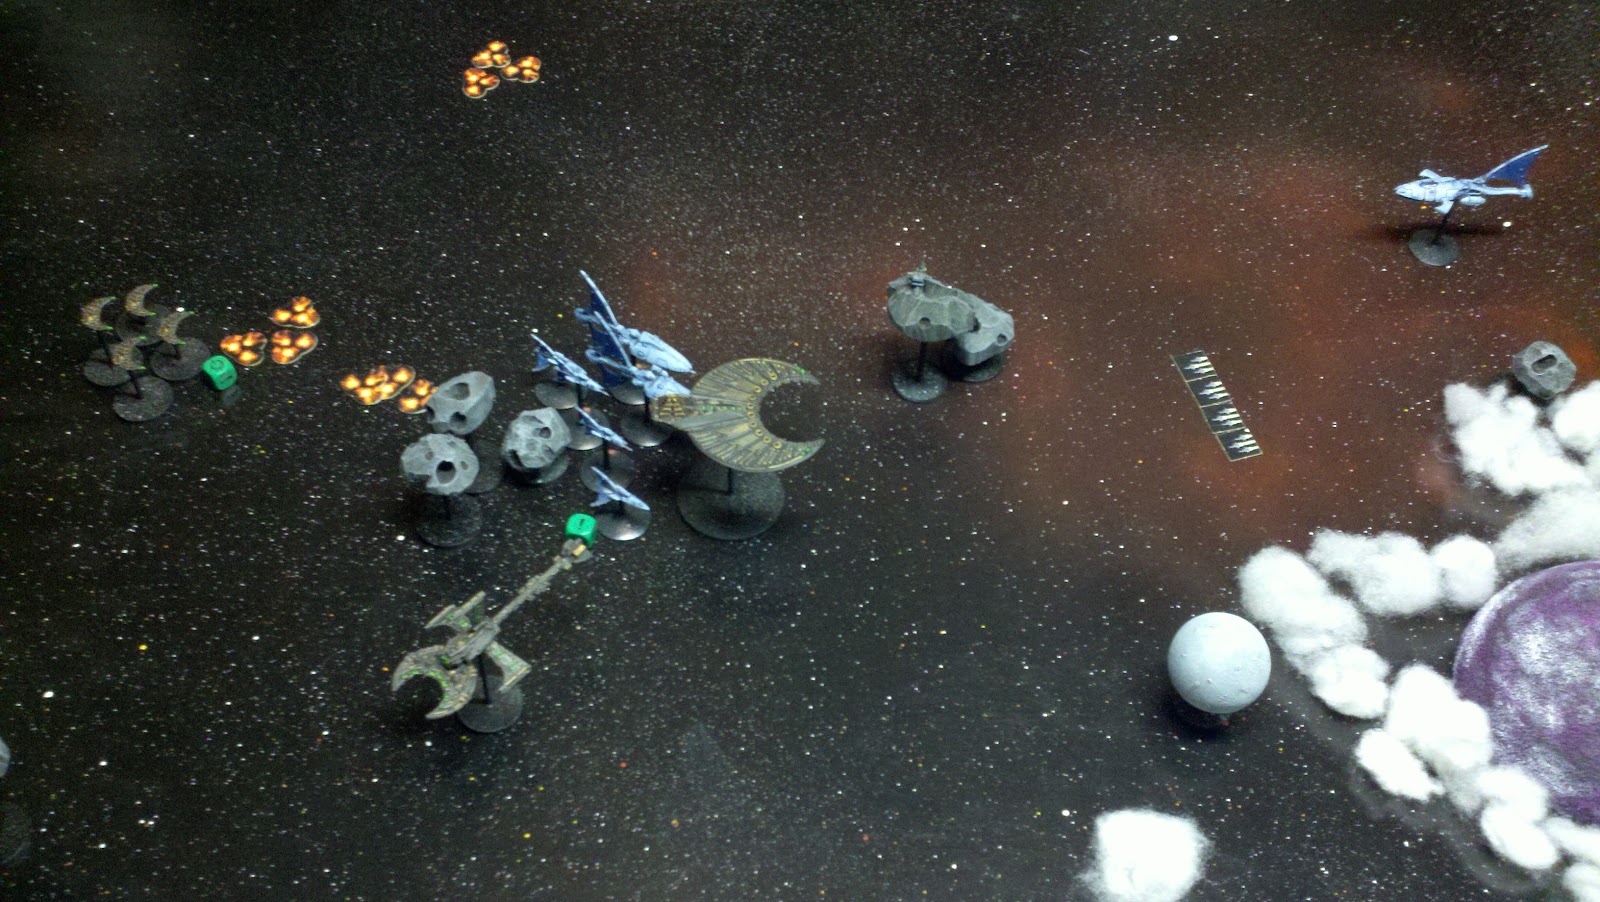
| Necron 4: The Tombship, Scythe, and Jackal 1 all arrive. All of the western squadrons go on All Ahead Full, all moving 70 besides the Tombship besides 50. The Tombship shoots the Void Dragon who braces. One particle whip makes it through and the Void Dragon braces it. It then takes two damage from Scythe’s Particle Whips when then results in a destroyed holofield critical and another damage. The Sepulcher does nothing to the 4 CWE bombers which then attack the Tombship doing 2 damage. The last Necron marker (for the Dirges) was placed (once again) on the western edge near where the larger ships just arrived. |
CWE 4: (missing picture) Shadowhunter 1 advances to try and destroy the Shroud but it braces and is undamaged. The Void Stalker rotates leftward and advances to avoid being in close range of the Necron batteries.
 |
| Necron 5: Jackal 2 does not come in yet. The Scythe Burns Retros and rotates right. The Void Dragon braces and looses two shields. The Tombship causes all sorts of carnage to the Void Dragon reducing it to 1 hit (so close). |
CWE 5: (missing picture) STILL the Dragonship has not come in. The Wraithships and Shadowhunter 2 arrive in the southwest, very close together. The Wraithship squadron Locks-on and advances. Shadowhunter 2 Locks-on and quickly advance. Shadowhunter 1 squadron turns around and approaches the 2 Necron behemoths. The Scythe braces and Shadowhunter 1 does 1 damage. The Wraithships shoots Jackal 1 with pulsars. Shadowhunter 2 causes 2 damage. The Wraithship squadron then causes 7 damage, 6 of which were braced. Then the Wraithship torpedoes take it down to 2 hits left.
 |
| Necron 6: STILL no Dirges. The Tombship Locks-on and shoots Wraithships which brace. After the onslaught of damage, Wraithship 3 is reduced to a blazing hulk, and Wraithship 2 takes 1 damage. The Star Pulse Generator hits the two remaining Wraithships and Shadowhunter 1 which braces. One Shadowhunter dies as a result. The Tombship’s Sepulcher attacks Wraithship 1 (who has ld 10) and the Wraithship passesits leadership. The Particle Whips are shot at Wraithship 1 and rolls 3 6s and 2 5s. All but one shot is braced which brings it down to 4 hits. The Scythe shoots everything at the back Shadowhunter and fails to do any damage. |
 |
| CWE 6: Shadowhunter 1 squadron Locks-on (we made a mistake because then it cannot turn). Wraithship 3 is still blazing and lurches forward. The remaining Wraithships brings the Tombship down 2 hits to 8. Shadowhunter 1 squad does very poorly and causes no damage. |
 |
| Necron 7: The Dirges arrive, Lock-on, and burst forward. Wraithship 3, a blazing hulk, floats forward and plasma overdrives. The Scythe shoot the back Shadowhunter that is sticking out from behind the asteroids. Shadowhunter 2 squadron braces and takes 1 hit (shield). The Dirges shoot at Shadowhunter 1 and kills 1 of them. They have many shields at the end. |
 |
| CWE 7: Finally, the Dragonship arrives. |
 |
| The Dragonship arrives in the east, goes All Ahead Full, advances, and launch bombers. The Wraithships reload their ordinance, fail, and pass on a re-roll. The Tombship braces knowing the entire close SWE fleet are going to shoot at it. All the shooting only does 1 damage, taking it to 7 remaining hits. |
Necron 8: Seeing that the Craftworld Eldar have split off the nearly crippled Tombship, the Necrons decide to phase out, anticipating a massacre. A solid victory for Craftworld Eldar!


